


.png&w=256&q=75)
Spill Proof Coffee Carrier - carrying mug coaster
Instructions Hardware Filaments
Spill Proof Coffee Carrier - Intermediate
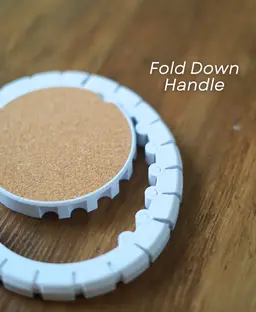
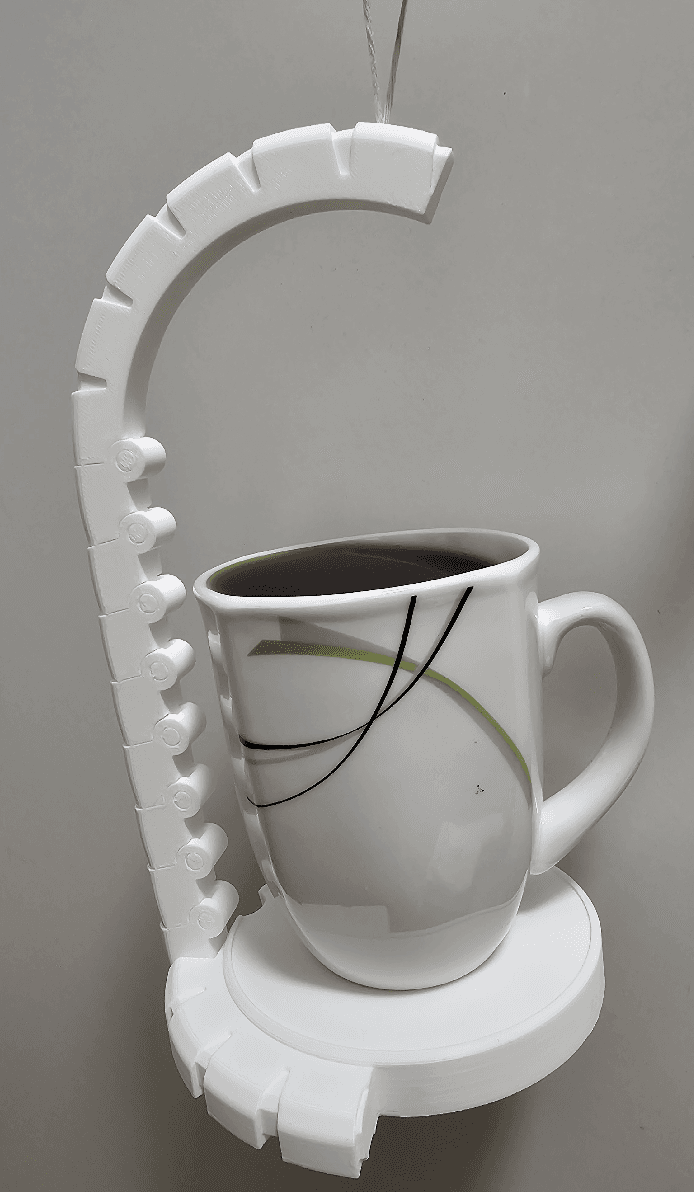
This coaster transforms into a spill-proof coffee carrier! This design is spill proof, thanks to physics! The center of the handle is directly over the center of the mug, much makes it spill-proof thanks to centripetal force! The stretchy hair tie also protects your mug from bouncing!
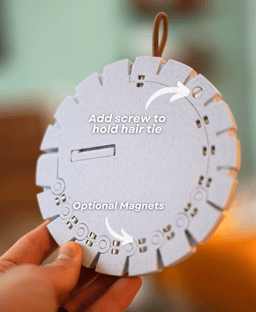
This design took over 50 iterations to get it working perfectly. The articulating hinges, and gravity lock mechanism were particularly tricky to get working, but its finally ready!
How does it work? Print in place hinges allow the bark to unroll. And a 90 degree hinge lets the handle rotate up and lock into place so you can carry your drinks! It locks via a special tilt-lock mechanism that keeps the base from tipping over when a mug is on it.
Magnets (optional) Zap the handle onto the coaster so you can move it around without the handle coming loose.
There is a spot to place a piece of cork in the center, for a super finished / polished feel.


Spill Proof Coffee Carrier - carrying mug coaster

Telephones Booth

Spinny Succulents - Pack III

Desktop Golf Gen 2
PlayBook'd - Playing Cards

Desktop Dumpster

PlayBook'd Cribbage

PlayBook'd Crosswords

Snack Attack - Gen 2

PlayBook'd Snakes and Ladders
.png&w=3840&q=75)
Date Night Daisy

PlayBook'd Settlers' Storage
Scoopy Stacks

Butterfly Fridge Magnets - Pack II

Playbook'd - Checkers

PlayBook'd - Shut the Box

PlayBook'd - Hook and Ring.3mf
Paint Can Drying Rack

Mossy Mounds

Playbook'd - Reversi

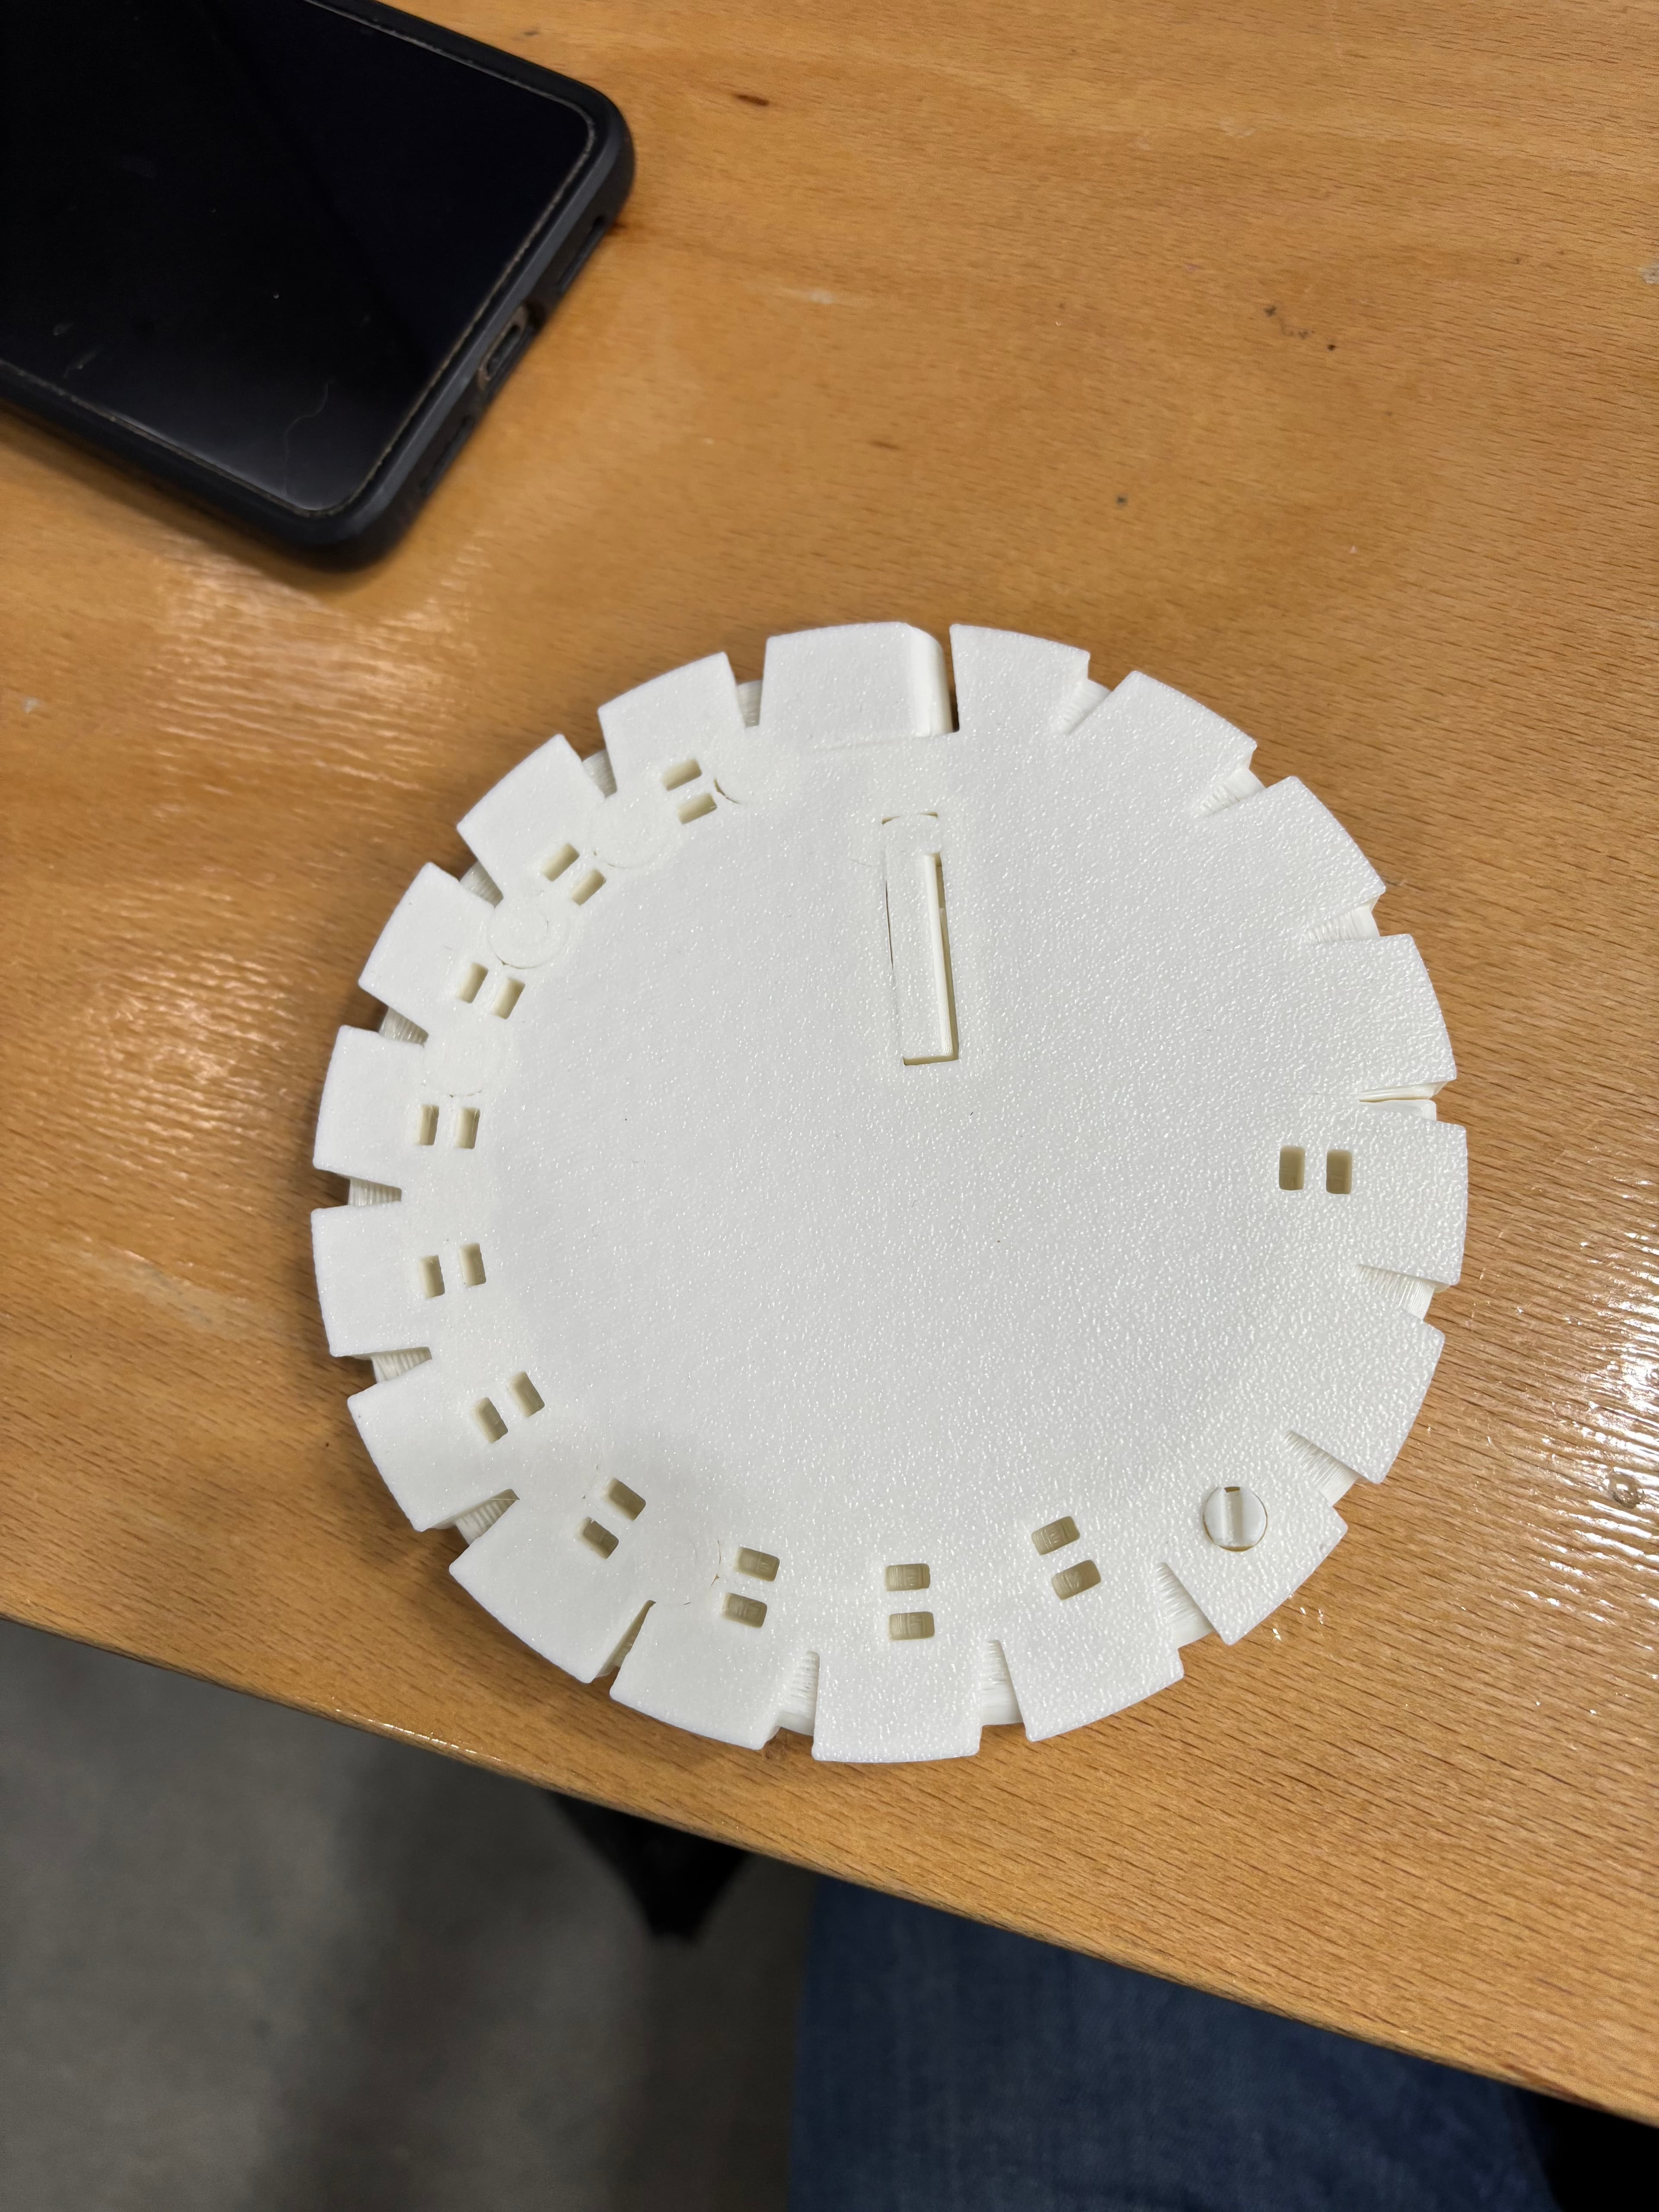
That looks like it got pretty fused together. Likely from "elephants foot". you'll need to cut it out with an exacto knife. in the future, see if you can get that elephants foot to go away! (many tutorials online)
Hi, I’m happy you figured out what was causing the fusing to happen. It is generally a good idea to keep the printer vented with pla to prevent the filament from getting too hot. As for the hair tie issue I’m unable to see it in the picture as it is cut off for whatever reason. From what I can see in the picture it looks like there may still be a small amount of fusing going on that could cause the carrier to not fully bend to the angle needed to hold the cup.
Why is the magnet holes are 2.65 mm when the recommended magnet is 3x5 mm? Could you modify the model to accommodate 3x5mm magnets?
The gap is undersized so that the magnets are pressed into place and can't come loose.
I’m having issues with the magnet holes as well. Even for a press fit they are too small. I managed to press one magnet in and it deformed the magnet hole and nearly split the plastic. Are you able to look at the file and adjust it maybe? Tolerances everywhere else are perfect it’s just the magnet holes
I made the slots for the magnets slightly larger. I hope that helps!
I tried to print with my trusty old Prusa MK3S+, but first time I had adhesion problems and print failed. Second time was much better but the joints are crunchy and don't work well. The hinges have fused together a bit. And the shark-fin pieces and slots, did not really work out either. The whole mechanism printed awfully, when moved (have to use both hands) makes sounds like old person joints from some cartoon kids show. Trying to print now newer printer, hope for the best.
I have managed to print on another printer, it is now much better. But I must say that I am rather disappointed with the model. The joints are still too stiff, and the tolerances too tight. The chain-link handle never does not wrap around the base on the first try because of the stiffness in joints and accumulated error causing the joints to not align with their relative slots in the base.
The sharp edges also do not help at all. Some chamber or fillet (rounding corners) would help a lot. Also taking into account the inaccuracies in the chain-link and accommodating for them in the base design.
Lastly, the 90-degree mechanism hidden in the base is unnecessarily over-complicated and always gets stuck because of too much freedom of movement and too high friction. Instead of this weird offset shaft thing, I would personally just used straight shaft with only 2 contact points - the though-hole at the edge letting the shaft go out of the base body, and cap at the dead-end, to reduce the friction.
Hi! Thanks so much for all the detailed feedback, I really appreciate it. I’m glad the second print came out better, and your notes definitely give me some things to think about.
Sorry if it comes off to harsh. I really love the visuals of this model, and put in a lot of effort to print it correctly. So there is a lot of frustration on my side. So sorry about that. I am more than happy to provide more detailed feedback and suggestions, if you want.
I really love the idea and design, but am struggling to print without the hinges fusing. Is it possible to increase the clearance between the parts? If using magnets, any play given by using more precise printers should be fine while then also allowing for slightly weaker setups to print as well.
There’s a normal amount of play built into the tolerances of this model. If you’re experiencing fusing, I’d recommend double-checking your filament settings, as over-extrusion or material expansion could be the cause. Getting your printer dialed in more accurately will help prevent this issue in the future as well. I’d be happy to share a few tips if you’d like.
hi i want to ask does having another brand of printers affect the file? i have a creality k1c and the print came out good but all the functional parts are not smooth. it came out rough and the handle was warped. i printed as instructed too.
That printer should be able to print this model. It sounds like there may have been an adhesion issue. Make sure to have a clean build plate